Welcome to the ultimate guide to growing autoflowers! If you’re new to the world of cannabis cultivation, you might be wondering what makes autoflower strains so special. Unlike photoperiod strains, which rely on changes in light cycles to trigger flowering, autoflowers automatically switch to the flowering phase after a certain amount of time. This means they can be grown and harvested much faster than traditional cannabis plants.
Autoflower strains have become increasingly popular among growers for their ease of cultivation, compact size, and potent yields. Whether you’re a seasoned grower looking to try something new or a beginner just starting out, this guide will provide you with all the information you need to successfully grow autoflowers from seed to harvest.
In the following sections, we’ll cover everything from the ideal light schedule and pH levels to the best substrate option s and common mistakes to avoid. We’ll also take you through each stage of the growing process, week by week, so you know exactly what to expect and how to care for your plants.
So let’s get started and dive into the world of autoflowering cannabis!
How Long Do Autoflowers Take From Seed To Harvest?
Autoflower strains of cannabis are known for their short growth cycle, which makes them a popular choice for growers who want a quick turnaround.
On average, autoflowers take around 8-10 weeks from seed to harvest. However, this can vary depending on several factors, including genetics, growing conditions, and the specific strain.
Some autoflowers may take as little as 6-7 weeks to reach maturity, while others may take up to 12 weeks or more. Additionally, factors like temperature, humidity, and light intensity can all affect the growth rate of your plants.
Light Schedule For Autoflowering Strains

When it comes to growing autoflowering strains of cannabis, one of the most important factors to consider is the light schedule. Unlike photoperiod strains, which require specific changes in light cycles to trigger flowering, autoflowers will begin to flower automatically after a certain amount of time, regardless of the light schedule.
That being said, providing your autoflowers with the right amount and intensity of light can greatly impact their growth and overall yield. As a general rule, autoflowers do best with 18-20 hours of light per day during the vegetative phase, Some growers even keep the lights on 24 hours a day to maximize the photosynthesis. However, the only limitation is cost of electricity.
It’s important to note that while autoflowers can be grown under any type of light, some options are more effective than others. LED lights, for example, are a popular choice among growers for their energy efficiency and ability to produce high-quality yields. HPS and CFL lights can also be used but may require more maintenance and have a higher energy cost.
The optimal range for grow lights is usually one or two feet away from the plants. However, you should visually inspect your plants regularly and adjust the height of the lights if you notice that your plants are getting too close to the lights and could potentially get burned. If the temperature at the canopy (uppermost leaves) goes over 30°C (86°F), you will need to raise the lights a few inches to fix the problem.
Importance of pH
Maintaining proper pH levels in the soil or growing medium is crucial for the healthy growth of autoflowers. pH affects nutrient availability to the plants, and if it’s too high or too low, the plants may experience nutrient deficiencies or nutrient lockout.
To ensure optimal pH levels, it’s important to regularly measure the pH of your soil or nutrient solution using a pH meter or pH test kit. The ideal pH range for most autoflowers is between 6.0 and 6.8.
Best Substrate Options
When it comes to choosing the best substrate for growing autoflowering cannabis, there are several options to consider. Each substrate has its own advantages and considerations, and the choice ultimately depends on your preferences and experience level. Here are some of the popular substrate options for autoflower cultivators:
- Soil: Soil is a traditional and beginner-friendly substrate choice. It provides a natural environment for the roots and contains beneficial microorganisms that support plant growth. Look for high-quality potting soil with a balanced nutrient profile. Avoid heavy soils that can hinder drainage, as autoflowers prefer well-draining substrates.
- Coco-coir: Coco-coir is a growing medium made from coconut husks. It has excellent water retention and aeration properties, allowing for optimal root development. Coco-coir is often used in combination with perlite to improve drainage. It provides a neutral pH and offers good control over nutrient absorption, making it a popular choice among autoflower growers. You can learn more about Coco-Coir substrate here.
- Hydroponics: Hydroponics is a soilless growing method that involves cultivating plants in a nutrient-rich water solution. This method provides precise control over nutrient delivery and can result in faster growth and higher yields. However, hydroponics requires more knowledge and monitoring, making it better suited for experienced growers.
When choosing a substrate, consider factors such as water retention, aeration, nutrient content, pH stability, and ease of use. It’s important to ensure that your chosen substrate is specifically formulated for cannabis cultivation and doesn’t contain any harmful additives.
Remember, regardless of the substrate you choose, maintaining proper watering practices and monitoring nutrient levels is crucial for the health and success of your autoflowers. Regularly check the moisture levels and adjust watering accordingly to avoid overwatering or underwatering.
Week by Week Guide to Grow Autoflowers

Embarking on the journey of growing autoflowers is an exciting and rewarding experience. To ensure the successful growth of your plants, it’s important to understand the different stages they go through week by week.
Whether you’re a beginner or have some experience under your belt, this comprehensive guide will equip you with the knowledge and techniques needed to maximize your autoflower’s potential at every step of the way.
So, let’s delve into the week-by-week journey of growing autoflowers and unlock the secrets to a thriving garden.
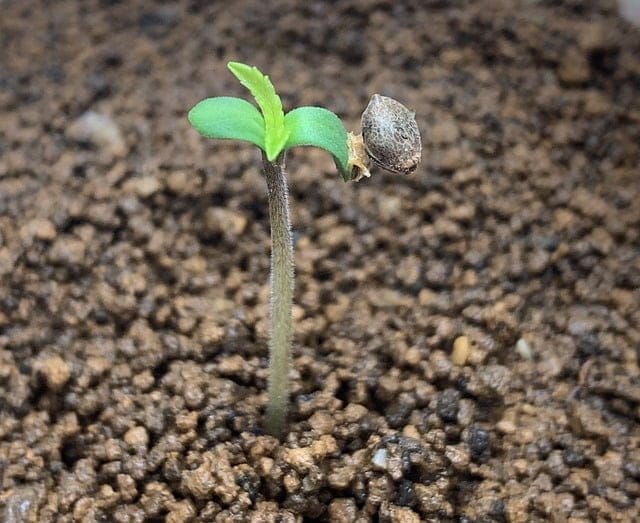
Week 1: Germination and Initial Seedling Stage
The first week of growing autoflowers is all about germination and nurturing the delicate seedlings. Proper seed germination is crucial as it sets the foundation for healthy growth. Here are some important points to keep in mind during this stage:
- Moisture is key: Ensure the growing medium is moist but not overly saturated. Use a spray bottle or gentle watering to avoid displacing the seeds or causing waterlogging.
- Provide warmth: Keep the germination area at a consistent temperature between 70-85°F (21-29°C) to promote quicker and more successful germination.
- Avoid light exposure: While autoflower seeds don’t require complete darkness, excessive light can hinder germination. Maintain a dark environment until the seedlings emerge.
- Patience is key: Germination times can vary, but typically, autoflower seeds will sprout within 2-7 days. Be patient and resist the urge to interfere or dig up the seeds prematurely.
- Proper planting depth: Plant seeds at a depth of around 0.5-1 inch (1.3-2.5 cm) in a well-draining growing medium. This provides the seeds with the necessary stability and moisture while allowing them to emerge easily.
- Gentle handling: When checking on the seeds or transplanting germinated seedlings, handle them with care to avoid damaging the delicate roots or shoots.
- Adequate humidity: Maintain a slightly higher humidity level (around 70-80%) to support the germination process. Dome the seedlings or use a humidity dome or clear plastic cover to retain moisture.
- Light introduction: Once the seedlings emerge, introduce a low-intensity light source, such as fluorescent or LED grow lights, to provide them with adequate illumination. Keep the light source at a short distance to prevent stretching.
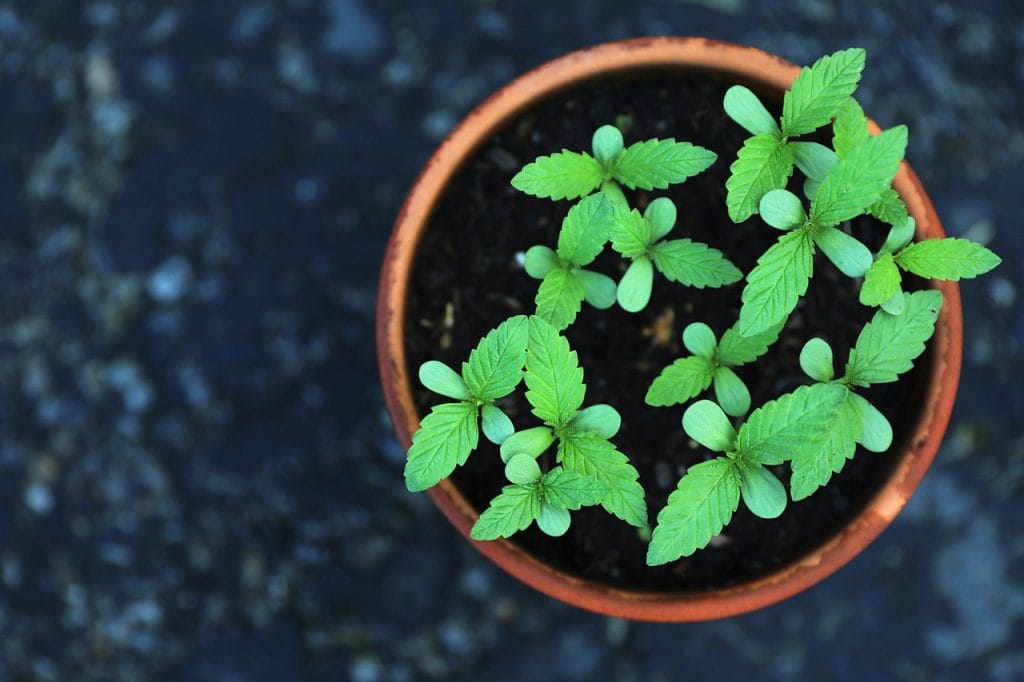
Week 2: Seedling Stage
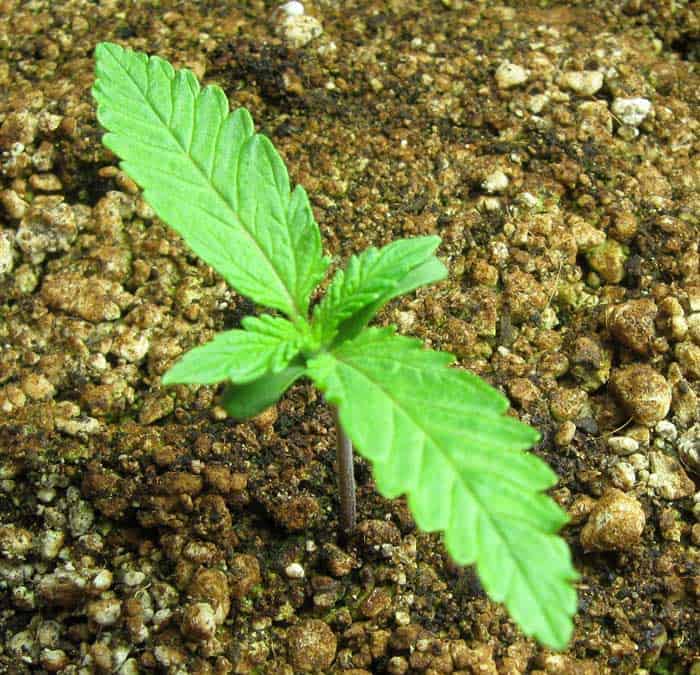
As your autoflower seedlings enter the second week, they transition into the late seedling stage, where their growth becomes more pronounced. This stage is crucial for establishing a strong root foundation for future growth. Here are important points to focus on during this week:
- Optimal lighting: Ensure your seedlings receive adequate light. Increase the light intensity gradually but avoid placing them too close to prevent light burn. Aim for around 18-20 hours of light per day to promote healthy growth.
- Proper watering: Water your seedlings when the top inch of the soil feels dry. Avoid overwatering, as it can lead to root problems. Allow the soil to dry out slightly between watering sessions to encourage the development of a robust root system.
- Nutrient introduction: Introduce a mild, balanced nutrient solution at quarter or half strength to provide essential nutrients for growth. Start with nitrogen-rich nutrients like Reefertilizer Grow to promote leaf development, but be cautious not to overfeed, as it can cause nutrient burn.
- pH monitoring: Continue monitoring and maintaining the pH level of your growing medium or nutrient solution. Aim for a pH range of 6.0-6.8 to ensure optimal nutrient uptake by the plants.
- Environmental factors: Maintain a comfortable temperature range of 70-80°F (21-27°C) during the day and slightly cooler at night. Adequate ventilation and airflow are essential to prevent issues like mould or damping off.
- Observation and adjustment: Monitor your seedlings closely for any signs of nutrient deficiencies, pests, or diseases. Adjust nutrient levels or address issues promptly to ensure healthy growth. Keep track of growth with a grow journal.
Week 3: Initial Vegetation Phase
During the third week, your autoflowers will be in full swing of the vegetative stage, with noticeable growth and the development of more leaves and branches. This is an exciting phase where you can focus on maximizing plant health and preparing for the upcoming flowering stage. Here are some important points to consider during this week:
- Light requirements: Autoflowers thrive with around 18-20 hours of light per day during the vegetative stage. Make sure to maintain a consistent light schedule and adjust the light intensity as needed.
- Nutrient balance: As your plants continue to grow, gradually increase the strength of your nutrient solution according to the manufacturer’s recommendations.
- Pruning and training: Consider using low-stress training (LST) techniques or selective pruning to shape your plants, encourage more lateral growth, and create an even canopy. This promotes light penetration and enhances overall bud development. Be careful not to over-stress or damage the plants during training.
- Environmental conditions: Continue to maintain a comfortable temperature range between 70-80°F (21-27°C) during the day and slightly cooler at night. Monitor humidity levels and aim for around 40-60% humidity to avoid excessive moisture-related problems.
- Nutrient deficiencies: Keep a close eye on your plants for any signs of nutrient deficiencies, such as yellowing or discolored leaves. Common deficiencies during the vegetative stage include nitrogen (N), phosphorus (P), and potassium (K). If deficiencies occur, adjust nutrient levels or pH accordingly to ensure healthy growth.
- Watering practices: Avoid overwatering, which can lead to root problems and stagnant growth. Maintain a balanced moisture level by allowing the growing medium to partially dry out between waterings.
- Continued observation: Regularly inspect your plants for any signs of pests or diseases.
Week 4: Mature Vegetation Phase
As your autoflowers enter the late vegetative phase in the fourth week, it’s time to prepare them for the upcoming flowering stage. This crucial period sets the foundation for robust bud development and overall plant health. Here are important points to consider during this week:
- Pruning and training: Continue with pruning and training techniques to shape your plants and create an even canopy. Remove any lower, shaded foliage or “sucker” branches that won’t receive adequate light.
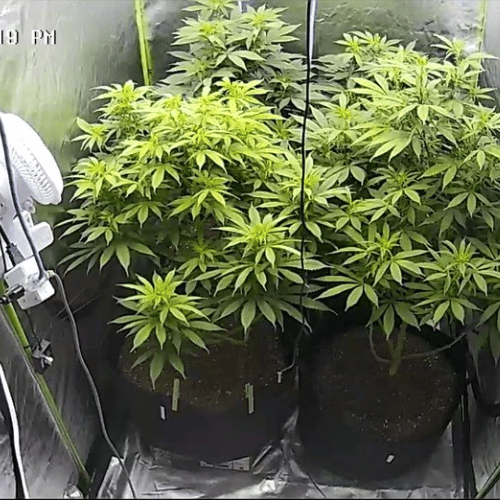
- Air circulation: Ensure there is adequate ventilation in your grow space, use oscillating fans to promote airflow, and avoid overcrowding plants. Proper air movement helps strengthen stems and prevents excessive moisture buildup. Read more about importance of air circulation.
- Humidity control: During the late vegetative phase, aim for a humidity range of 40-50%. Consider using a dehumidifier if necessary to maintain optimal conditions.
- Continued nutrient management: Maintain a balanced nutrient regimen suitable for vegetative growth like Reefertilizer Grow, gradually increasing the nutrient strength as recommended by the manufacturer. Monitor plants for any signs of nutrient deficiencies or excesses and adjust nutrient levels accordingly.
- Environmental factors: Maintain a stable temperature range of 70-80°F (21-27°C) during the day and slightly cooler at night. Avoid drastic temperature fluctuations, as they can stress the plants. Also, ensure the grow space has appropriate light coverage and intensity to support healthy growth.
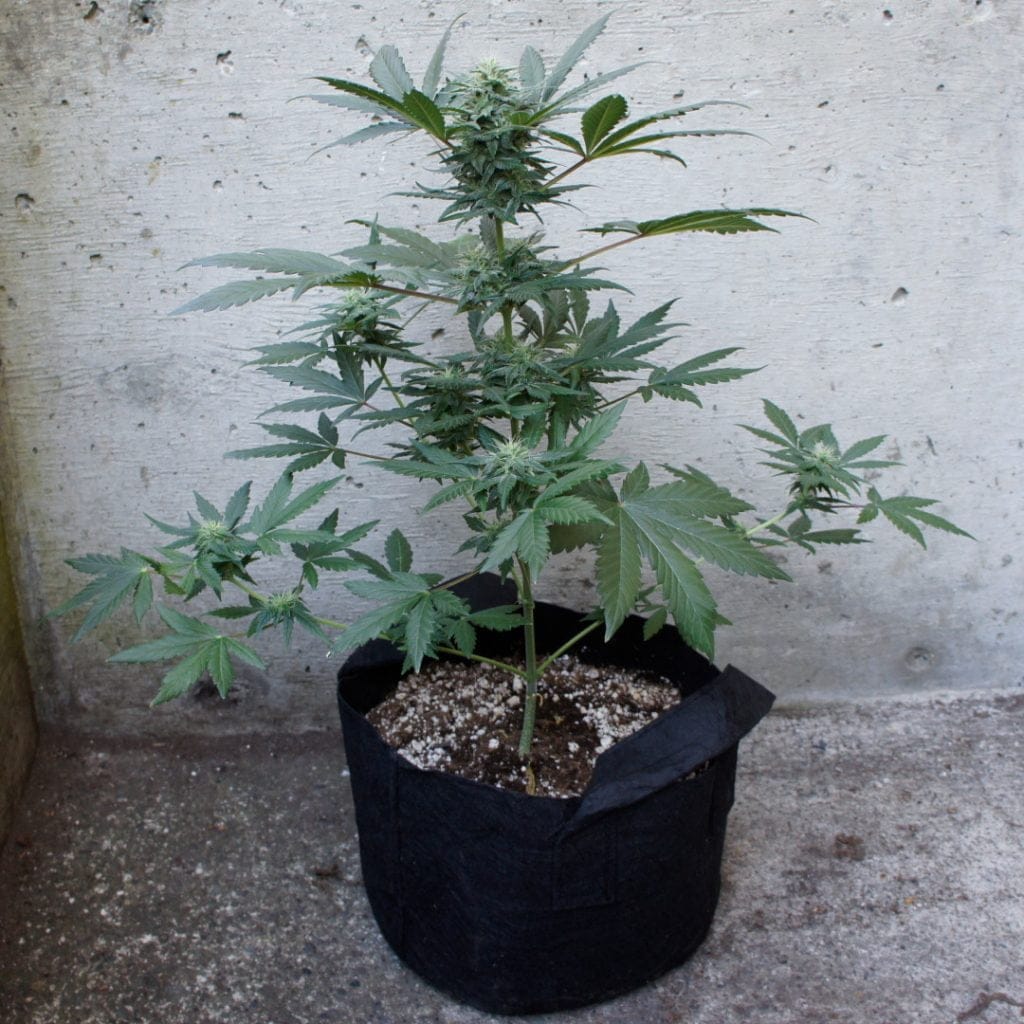
Week 5: Flowering
Congratulations! In the fifth week, your autoflowers have entered the highly anticipated flowering stage. This phase is characterized by the development of buds and the onset of resin production. To ensure successful flowering and maximize your harvest, it’s crucial to make some adjustments to your growing conditions. Here are important points to consider during this week:
- Optimize temperature and humidity: Maintain a slightly cooler temperature range between 65-75°F (18-24°C) during the day and slightly cooler at night. This helps preserve terpenes and resin production. Keep humidity levels around 40-50% to prevent excess moisture and reduce the risk of mold or mildew.
- Support bud growth: Provide appropriate nutrients for the flowering stage, with a focus on phosphorus (P) and potassium (K) to encourage robust bud development. Use a flowering-specific nutrient formula like Reefertilizer Bloom and adjust the nutrient strength according to the manufacturer’s guidelines. Monitor plants closely for signs of nutrient deficiencies or excesses and make necessary adjustments.
- Strengthening plant structure: As your plants develop larger buds, they may need additional support to prevent branches from bending or breaking. Use plant stakes or trellis nets to support heavy colas and promote an even canopy. This helps maximize light penetration and airflow, reducing the risk of bud rot.
- Prevent mold and mildew: Flowering buds are particularly susceptible to mold and mildew. Ensure good air circulation by maintaining proper ventilation and using oscillating fans to promote airflow. Regularly inspect the plants for any signs of mold, especially in dense bud clusters. If detected, remove affected parts immediately to prevent further spread.
- Patience during flowering: The flowering stage typically lasts several weeks, and different strains may have varying flowering times. Be patient and avoid unnecessary interference. Avoid excessive pruning or defoliation during this stage, as it may stress the plants and affect bud development.
Week 6: You Can Smell Something
In the sixth week, your autoflowers will be well into the flowering stage, and you may start noticing the delightful aroma emanating from the developing buds. This phase requires continued vigilance to ensure optimal plant health and bud development. Here are important points to consider during this week:
- Monitor for stress and deficiencies: Pay close attention to your plants for any signs of stress or nutrient deficiencies. Stress factors can include temperature fluctuations, light interruptions, or pest infestations. Nutrient deficiencies can manifest as yellowing or discolored leaves. Promptly address any issues that arise to prevent negative impacts on bud development.
- Odor management: As the buds continue to develop, they release potent and distinct aromas. If odor control is a concern, consider using activate carbon filters and exhaust fansto minimize the smell. These devices help neutralize odorous compounds and prevent strong scents from escaping your grow space.
- Air circulation and ventilation: Ensure good ventilation by using fans to create gentle airflow, which helps maintain an optimal microclimate and reduces the risk of mold or mildew. Avoid excessive humidity and stagnant air pockets by allowing fresh air to circulate within the grow space.
- Nutrient adjustment: Continue providing the necessary nutrients for the flowering stage, focusing on phosphorus (P) and potassium (K). Monitor nutrient levels and adjust as needed based on plant response and any signs of deficiencies or excesses. Remember to follow the recommended feeding schedule and use a balanced flowering nutrient formula like Reefertilizer Bloom.
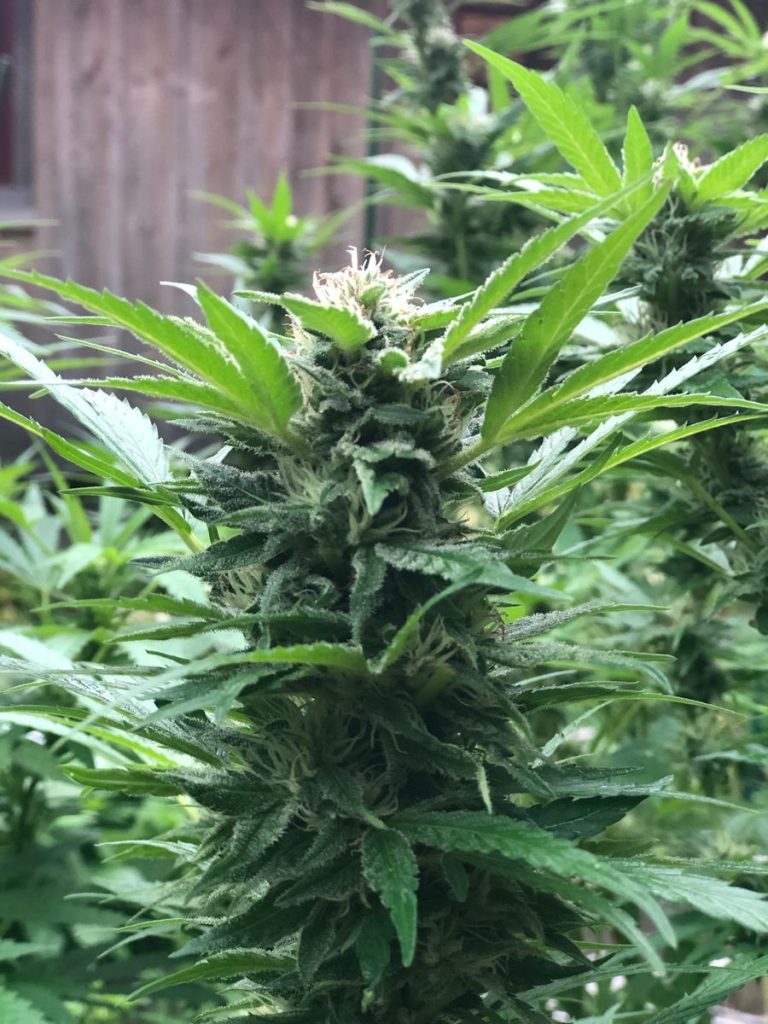
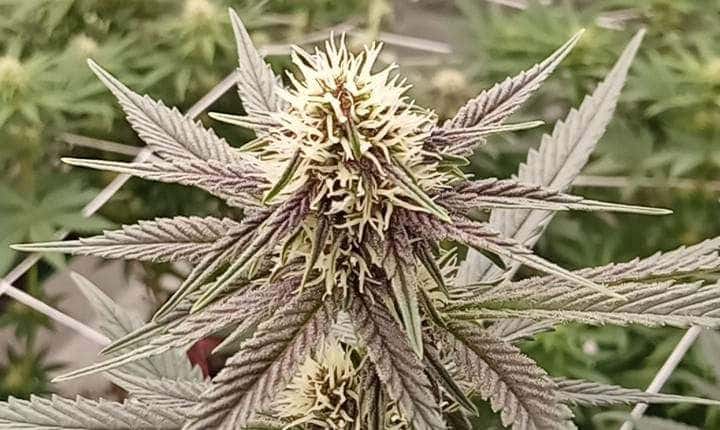
- Trichome monitoring: Keep a close eye on the trichomes—the resinous glands that contain cannabinoids and terpenes—using a jeweler’s loupe or a magnifying glass. As the buds mature, trichomes will change in color from clear to milky white or amber. The desired harvest time depends on personal preference, with milky trichomes indicating peak potency and amber trichomes suggesting a more relaxing effect.
Week 7: Routine Checks
During the seventh week, regular checks for nutrient levels, pH, and overall plant health are vital. Adjust nutrient levels as needed to support optimal bud development. Monitor and maintain the pH (6.0-6.5 for soil and 5.5-6.5 for hydroponic systems) to avoid nutrient imbalances. Conduct visual inspections to identify signs of stress, nutrient deficiencies, pests, or diseases. Troubleshoot common problems like nutrient burn or lockout by flushing the medium and adjusting pH. Ensure proper environmental conditions, including ventilation and airflow, to prevent mold or bud rot. Routine checks and timely interventions contribute to healthy plants and a successful harvest.
Week 8: Flush and Defoliate
In the eighth week, as you approach the final stages of growth, two essential practices to consider are flushing and defoliation. Here’s what you need to know about each:
- Flushing: Flushing involves giving your plants only plain, pH-balanced water without any nutrients for a period before harvest. This process helps remove excess salts, minerals, and residual nutrients from the growing medium and plants. Flushing allows for a smoother and cleaner smoke, enhancing the overall quality and taste of your buds. To flush, simply water your plants with plain water for the last 1-2 weeks before harvest, ensuring that the runoff has a clear, clean appearance.
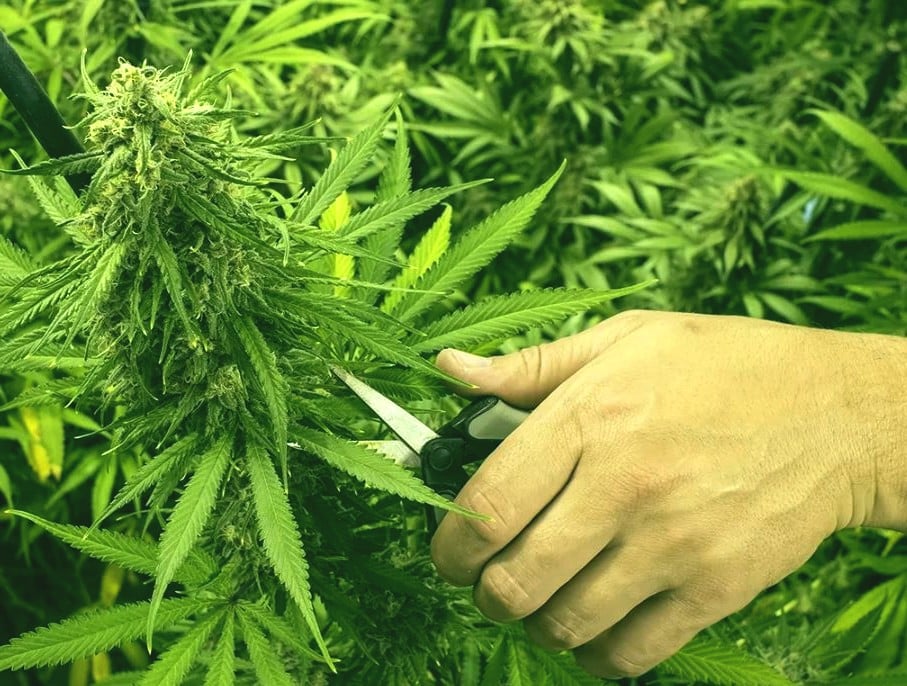
- Defoliation: Defoliation is the selective removal of certain leaves during the flowering stage. It helps improve light penetration, airflow, and bud development. By removing larger fan leaves that block light from reaching lower buds, you promote the growth of those lower buds, resulting in a more even canopy and potentially larger yields. To defoliate properly, use clean scissors or pruning shears to carefully remove larger fan leaves that shade lower bud sites. Be mindful not to remove too many leaves or stress the plants excessively. Aim to maintain a balance between leaf removal and preserving enough foliage for photosynthesis.
Click here to read more about importance of defoliation.
Week 9: Getting Ready for Harvesting
Before harvesting, it’s essential to prepare your plants. Stop watering them a few days before harvest to allow the soil to dry out slightly. This helps prevent excessive moisture in the buds during the drying process. Consider dimming or turning off the grow lights for a day or two to reduce resin oxidation.
Week 10: Harvest

Congratulations, you’ve reached the final week of the growing cycle—the time to reap the rewards of your hard work. As you embark on the harvest process, here are the key steps to ensure the best results:
- Trimming the buds: After harvesting, it’s essential to trim the buds to remove excess leaves and stems. Use sharp, clean scissors or trimming shears to carefully remove any undesirable plant material. Focus on removing larger fan leaves, while leaving smaller sugar leaves that contain valuable resin intact. This process enhances the appearance and overall quality of the buds.
- Drying the buds: Proper drying is crucial to preserve the flavor, aroma, and potency of your harvest. Hang the trimmed buds upside down in a dark, well-ventilated area with moderate humidity. Maintain a temperature of around 60-70°F (15-21°C) and humidity levels of 45-55%. Allow the buds to dry slowly and evenly for 7-14 days, depending on their size and environmental conditions. Avoid rapid drying or high humidity, as they can lead to harsh-tasting buds or mold growth.
- Curing for optimal quality: Curing the dried buds is an additional step that greatly enhances their flavor, aroma, and smoothness. Place the dried buds in glass jars, filling them about 70-80% full. Seal the jars and store them in a cool, dark place with a temperature of around 60-70°F (15-21°C). Open the jars daily for the first week to release excess moisture and check for any signs of mold. After the first week, open the jars every few days for a few minutes to allow fresh air exchange. Curing typically takes 2-4 weeks, but longer curing periods can lead to even better flavor and quality.
- Storing the buds: Once the buds are adequately dried and cured, it’s time to store them properly. Use airtight containers such as glass jars or food-grade plastic containers with tight-fitting lids. Store the containers in a cool, dark, and dry place, away from direct light, heat, and humidity. Proper storage helps maintain the potency, flavor, and aroma of the buds for an extended period. Using a product like Boveda can increase shelf life by several months. Remember to monitor the stored buds regularly for any signs of mold or moisture.
Growing autoflowering cannabis cultivars can be a rewarding and fulfilling experience. Throughout this guide, we’ve covered the essential aspects of growing autoflowers, from seed to harvest. By understanding the unique characteristics and requirements of autoflowers, you can optimize your cultivation techniques and maximize the quality and yield of your harvest.
Remember, each week of the growth cycle plays a vital role in the plant’s development, and paying attention to the specific needs of each stage is crucial. From germination to the flowering stage, ensuring proper light schedules, nutrient levels, pH balance, and environmental conditions will help your autoflowers thrive.
Additionally, avoiding common mistakes such as poor timing, improper germination, incorrect substrate choice, overwatering, and underfeeding will contribute to successful growth and a bountiful harvest. Don’t rush the process—take the time to observe, adjust, and provide the care your plants need.
Ready to embark on your autoflowering cannabis growing journey? Take a look around Reefertilizer’s website to explore a range of high-quality nutrients and fertilizers specifically designed for cannabis cultivation. Our products are formulated to support the unique needs of autoflowers, promoting healthy growth and impressive yields. Join our community of passionate growers and take your cultivation skills to new heights. Start your autoflowering adventure with Reefertilizer today!
Tips For Using Reefertilizer Nutrients With Autoflowering Cannabis
Feeding autoflowers is a little different than feeding normal photoperiod plants. With the shorter lifespan and smaller plants you will be using less nutrients overall. Take a moment to use the Reefertilizer feeding calculator set to “Reefertilizer Classic (autos)”.
The trick is starting with a lower nutrient strength and gradually increasing it over time.
Should I Top My Autoflowers?
Topping autoflowers is not recommended as it can cause stress that slows down growth temporarily. However, it can be worth experimenting with.
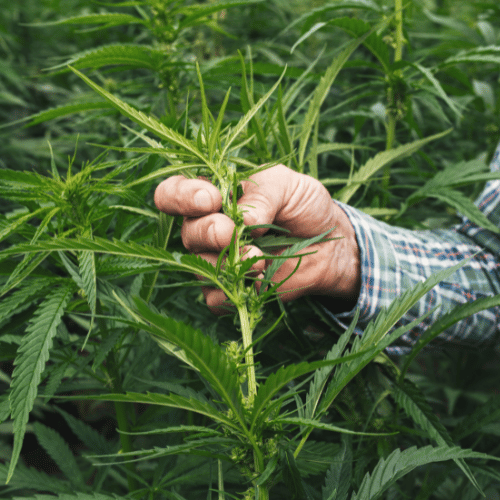
Topping involves cutting off the newest growth at the top of the plant, which creates two offshoots and makes the plant grow shorter and bushier. This technique is often used during the veg stage to improve light coverage and create larger bud clusters.
If you decide to top your autoflowers, make sure to use clean pruning scissors and do it right after transplanting to give your plants a shorter stress recovery period. Keep in mind that topping can make your plants easier to maintain and harvest, and it can also prevent them from growing too tall and looking like a Christmas tree.
If you want to learn even more about growing good cannabis, we offer a free 40+ page guide full of images.
Now available on Amazon.
Sign up for our newsletter and download the digital copy today!
This guide will answer many questions about growing cannabis, like the following...
Selecting Seeds
Identify and Correct Problems
Maximize Yield
Much More...
Get a Chance to INSTANTLY WIN a Reefertilizer Nutrient Kit When You Sign Up.
Mike Drouin is the co-founder of Reefertilizer. He’s an experienced craft cannabis grower and a writer of many articles regarding the process. Mike lives on Vancouver Island and enjoys cycling and camping and will sometimes combine the two.