
Space buckets are a great way to grow at home when you don’t have the room or money to buy a grow tent. They are perfect for one plant, but I have seen people grow up to four in one space bucket (they might be pushing it). You will not get as big of a yield as you would with a professional grow room, but you should be able to harvest around an ounce of flower every grow. It’s a great way to try new genetics or supplement your stash.
What is a Space Bucket?
A Space bucket is a small self contained growing space used for growing cannabis. A space bucket can be built many different ways but will include intake and exhaust fans and a light source. The biggest advantage of building and using a space bucket is their ability to be moved easily and to take up as little space as possible. They can also be quite stealthy when there are no light leaks and a carbon filter is used.
Building Your Own Space Bucket
For ease, I have used Amazon.com links for items that will also ship to Canada. Some of these items you can get for much cheaper or even free. While I was researching I discovered there are some items on Amazon USA that are way cheaper than Amazon Canada, even with the conversion rate. For example, the LED light was $170 CAD compared to $70 USD ($92 CAD). The prices on the list below are in United State dollars and may vary from different suppliers. They’re there to give you an idea of the costs associated with this build.
Materials Required
1x Mylar film
1x Apollo Horticulture GL60LED Full Spectrum 180W LED Grow Light
1x LED Strip for plants
2x Electric Fan (92mm)
(or) 2x Electric Fan (120mm)
1x Mechanical Timer
2x 5 Gallon Bucket You can easily get a much cheaper one at a Canadian Tire or Rona, I got mine for only $8 total
1x 5 Gallon Bucket Lid Much cheaper at Canadian Tire or Rona
1x Duct Tape 60 yards
1x Length of 1/4” thick rope (about a 1m or 3’ long)
4x 1/4” (or 6mm) bolts with nuts and washers
1 can of spray glue (found at most craft stores)
1 tube of silicone sealant (optional)
Tools Required
Dremel or rotary tool (for cutting plastic)
Drill
Phillips screwdriver
Safety Glasses
Total cost using Amazon ~ $220
My cost ~ $175 (I used much cheaper buckets from Canadian Tire and already had a timer)

Step 1 – Make a Plan
You’ll want to start this project by planning out how you want to build your space bucket. Drawing a little sketch like I did will help you visualize where everything will be going and how you should proceed.
This Space Bucket has 4 parts. From the bottom to the top you have.
- 3” tall drip tray (made from the bottom of your top bucket)
- Bottom bucket (holds your air intake)
- Top bucket (holds air out-take and led lights)
- Lid (Your large LED is mounted to its underside)
Step 2 – Measure twice, cut once
Alright, let’s get cutting! You will need to cut out the bottom of one of your buckets to use as the drip tray. Measure 3” from the bottom of your bucket and mark it with a sharpie. Make a few of these marks to make sure it’s even all the way around. You can mark this line with some masking tape to use as a guide while you cut. Once done you will have a drip tray that will fit perfectly onto the bottom of your bucket!
When cutting the bucket, plactic dust will get everywhere. If you’re using a rotary tool like a dremel, make sure you’re wearing your safety glasses.
Next, on your bottom bucket (the one you didn’t cut) drill some drainage holes for water to drip into the drip tray. You will also want to remove the handle on this bottom bucket too, you won’t need it and it will get in the way. We will keep the top handle though, it makes it easier to move your space bucket around.


Step 3 – More measuring and cutting
For my space bucket, I wanted to make the top half lock on to the bottom. This way, I can carry the whole thing around with the top handle. To accomplish this I cut 4 “L” shaped channels that would fit the 4 quarter inch bolts.
The easiest way to do this was by drilling some holes and installing the bolts first. Then placing the bottomless bucket on top of these bolts. Mark the 4 spots on the bucket where the bolts line up. Draw a line about 1.5” long then draw another line 90 degrees to the left, again about 1.5” long. You will have to cut out a ¼” channel on these lines for the bolts to slide into. Make sure all these channels are pointed in the same direction.
Once done, your top bucket should be able to slide onto the bolts, and a quick twist will lock it into place.
There will be a gap between the two buckets, but we will fix that later on.


Step 4 – I’m a fan of fans
You will need to cut out the space to install your fans. The easiest way to do so is by using the grill for the fan as your guide.
Let’s start with the bottom bucket. You’ll want to place your fan about a half inch below the lowest bucket rim (if you have them). Basically, this fan should be around the base of your plant.
Using the grille as your guide, mark the 4 small holes and trace the circle of your grille.
Drill the 4 holes and use your cutting tool to cut out the circle.
Repeat this process on the top bucket. Don’t mount the fans just yet, you will have to cover the bucket in duct tape and mylar first.
UPDATE:
After using this bucket for several grows I would recommend going with a 120mm fan instead of 92mm one. Up sizing the fan will help the bucket run cooler on the inside and avoid heat stress.


")
")


Step 5 – Lid Holes
Your LED light will come with 3 brass hangers. These are meant to attach clips to so you can hang your light. We won’t be needing them since the light will be mounted to the plastic lid directly. These little brass fasteners can be easily removed by inserting a small screwdriver through the hole and turning them counterclockwise. They are attached by a nut on the inside. When you remove them, you’ll probably hear that nut dropping inside. These fasteners were 4mm in diameter.
Next you’re going to have to mark out the holes you will need to cut into the lid. There will be 3 small drill holes to mount to, one large hole in the center for the LED fan, and another hole for the power. It can be tricky marking these holes out. One way would be to get a large piece of paper and trace the holes required. Taking this piece of paper and placing it on the top of your lid and marking the lid with an awl or sharp tool. Then marking some dots and lines for where you need to drill and cut.
Double check if it looks right, then it’s time to drill and cut your holes
Mounting the LED to the lid
You will then have to remove the back of the LED lamp to fasten it to the lid. There are 3 screws around the side that you will have to remove to take it apart. The top and bottom of the light fit together very snug. After removing the screws you will have to hold the LED light side up and give it a gentle shake to separate it from the bottom. Find those 3 loose 4mm nuts. We will use them to fasten the lid. I found some 4mm x 6mm pan head phillips stainless steel screws and some 4mm fender washers. Fender washers are washers with a larger diameter, this will help make the mounting much more sturdy and make up for an oversized drill hole.
Thread the screw through the washer, then through the lid, and into the top of the LED housing, then tighten with the nut. Repeat with the other 2 holes and the lid should be securely fastened.
Flip The LED Fan
While you’re inside the LED light, there’s one more thing you can do to help your bucket from getting too warm. The fan inside is installed to blow towards the LEDs, this will cool the lights, but trap warm air in the bucket. If you flip the fan in the other direction, it will help blow hot air out of the bucket and keep the LEDs cool.
Now reattach the top of the LED housing to the bottom.
Step 6 – Duct tape outside, mylar inside
Duct tape is used to increase the opacity of the bucket so that less light bleeds through. No duct tape on a white bucket like this one will turn it into a lamp. You will want to cover the outside of the buckets with at least one layer of duct tape. It’s best to do this before you mount the fans. Just wrap the entire bucket covering the holes. We will cut out the holes once we’re done applying the tape and mylar. Don’t forget to cover the drip tray with tape as well.
Mylar is hella tricky to work with. It’s very light and a little difficult to cut, but very necessary if you want to reflect as much light as possible towards your plant. When you buy mylar online it usually comes in a folded sheet. I added mylar to both my bottom and top bucket, but you could easily get away with adding it to only the top. I have a 3 gallon planter that came up an inch below the top bucket, so the bottom bucket mylar made no difference to me.
I applied the mylar with spray glue to the inside of the bucket. It was a bit tricky because of the folds in the material. Next time I will roll up the mylar on a stick or something so I can more easily apply it to the bucket by spraying glue and rolling it on.
When your done and the glue is dry, cut out the holes for your fans with a razor.


Step 7 – LED strip
These LED strips will be going around the inside of the top bucket. At the end of the strip is a power adapter that will have to be connected outside the bucket. You will have to drill a hole large enough for the strip to pass through. To keep the wire secure, use some silicone to plug the hole.


Step 8 – Mind the Gap
So you’ve noticed there a half inch gap between the top bucket and the bottom one. We’re going to need to find a way to seal this so air and light aren’t escaping. I decided to make a seal out of nylon rope and duct tape. You will tape the rope near the opening of the bottom bucket. Run this rope all along the inside and keep it in place with the duct tape. The rope will serve to fill up most of the gap. Using even more duct tape over the rope and secure over the lip of the bucket. Add enough tape to make a snug fit.
Step 9 – Mount the fans
Now that the bucket is almost complete, you can mount the intake and outtake fans. Make sure they are blowing in the right direction. Mount one the grilles on the inside, and thread it all together. Start tightening the screws as much as possible. You want these to be a flush as possible, flattening the bucket as you tighten the screws. Once both the fans are attached, use some silicone to seal the space between the fan and bucket.
Step 10 – Plug it all in and test it out
So now that you’ve completed the build it’s time to set up the electronics. For this one I have a good quality grounded power bar, with the timer outlet attached to bottom most outlet. I like to keep the air intake fan on at all times, so that plugs into the power bar. You can also attach the air outtake fan directly to the power bar. I have the LED strip and LED grow light plugged into the timer.
After I completed this build, I found a very handy gadget that I’ve added to the bucket. It’s a digital hydrometer and thermometer that controls two power outlets. You can set it to turn on fans depending on the internal temperature of the bucket. I have mine set to run the outtake fan when the temperature rises above 30°C. If you want to get even fancier you could set it up to control humidity as well.

Step 12 – Start Growing in your Space Bucket!
Because the bucket we used was 5 gallons, a 5 gallon smart pot will be just a little too big to fit inside. Smart pots are great because they allow the soil to breathe. A 5 gallon fabric pot will be flush with the wall of the bucket, eliminating the benefits of using a smart pot. A 3 gallon smart pot or planter will give you enough room to remove the plant and pot from the bucket and allow the smart pot to breathe properly.
It’s not hard to maintain the ideal environment inside the bucket. You can quickly lower the temperature by turning on the outtake fan. You can raise the humidity by pouring water into the drip tray to evaporate. Mine is in my apartment and is a little dry and cooler because of the winter, but so far it has stayed in the right levels without much work on my part. There are tools available that will automatically adjust the environment to your specifications by turning fans and humidifiers on and off. I’ve heard of people going as far as attaching small computers to their space bucket allowing them to control the environment remotely!
What is the optimum growing environment?
Seedlings
Humidity – seedlings like a humid environment between 60%-70% RH. Covering them in a plastic bag is the easiest way to do this.
Temperature – 20-25°C in the day and 5°C cooler at night
Growth Stage
Humidity – 40%-60% RH
Temperature – 22-28°C in the day and 5°C cooler at night
Flowering Stage
Humidity – 40%-50% RH going any higher could encourage mold
Temperature – 20-26°C in the day and 5°C cooler at night. Avoid higher temperatures during flower to avoid losing any terpenes.
Things to keep in mind about your space bucket
This bucket will grow one plant really well. Because you won’t be able to determine the plants’ gender until flower, you might want to stick to using feminized seeds to save you time. You can learn more about plant gender in our free grow guide available below.
Because we are only using around 200 Watts of light, you won’t be getting any monster buds. You could totally upgrade the bucket, but I imagine you will start running into problems with heat. I’m a big fan of experimentation, so if you have any ideas on how we could improve this setup, let me know in the comments below. If you build one, send us some pictures! I love seeing what other growers are doing. Thanks for reading!
#GrowGoodWeed
This is the first part of a 3 part series about growing with a spacebucket.
Part 2 – Spacebucket Update – Fan Adapter, Humidity, Temperature, and Smell Control
If you want to learn even more about growing good cannabis, we offer a free 40+ page guide full of images.
Now available on Amazon.
Sign up for our newsletter and download the digital copy today!
This guide will answer many questions about growing cannabis, like the following...
Selecting Seeds
Identify and Correct Problems
Maximize Yield
Much More...
Get a Chance to INSTANTLY WIN a Reefertilizer Nutrient Kit When You Sign Up.
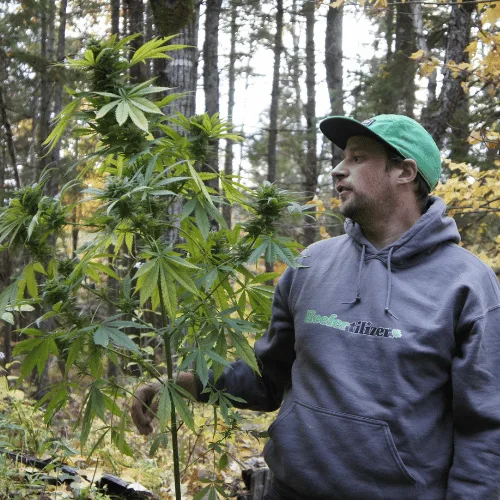
Mike Drouin is the co-founder of Reefertilizer. He’s an experienced craft cannabis grower and a writer of many articles regarding the process. Mike lives on Vancouver Island and enjoys cycling and camping and will sometimes combine the two.
Comments are closed.