A new cannabis plant can begin its life as either a seed or a cutting from an adult plant that will grow into a clone of its parent. Cloning has some advantages, such as faster growth, guaranteed female plants, and a predictable phenotype (since it’s exactly the same as the parent), but there are downsides as well.
Cloned plants are often more sensitive to environmental conditions than seed-grown plants, making this process more suited to experienced growers – and, due to cloned plants having a less developed root system, they may not grow as large or have as high a yield as they would if they had been started from seeds. Finally, you can’t clone a plant unless you already have a plant to clone!
Whether you’re just starting out and growing your very first plants, or you’re just brushing up, here’s everything you need to know to start a cannabis plant from seeds.

Check Your Local Cannabis Laws
 Before you even buy your seeds, make sure you are aware of your local and national laws regarding cannabis! Just because seeds are accessible doesn’t mean that it’s legal to grow cannabis in your area.
Some online sellers ship to illegal areas, and there are some areas (such as the UK) where it’s completely legal to purchase and possess cannabis seeds, but you will be breaking the law if you try to germinate them. So, do your research, and place your order when you know you’re in the clear.
Conditions for Germination
Not all seeds are born equally healthy, and some may not germinate. A good general rule of thumb is that healthy cannabis seeds should be hard and dark.
Seeds that are soft or light-colored may still be viable, but it isn’t likely.
Regardless of what type of seed you have – autoflowering seeds, feminised seeds, etc – the germination process will be the same. In a nutshell, germination is the process of setting up the ideal conditions to convince your baby cannabis plants to break out of their shells (seeds) and lay down their first roots, known as taproots.

Cannabis seeds need specific conditions in order to germinate:
- Moisture – the key word here is “moist” – just moist. Avoid letting your seeds get soaking wet, or they may not germinate.
- Temperature – once again, the key is moderation. Keep your seeds warm, but don’t let them get too hot. Room temperature is a safe sweet spot.
- Hygiene – keep the area your seeds are germinating in clean! The plants’ health is easy to disturb at this stage.
- Peace – Until your seeds have finished germinating and are ready to be moved to a pot or other container, do not touch, prod, poke, or otherwise disturb the seeds.
Germinating Marijuana Seeds
There are several methods you can use for germination, although the environmental factors should be kept roughly the same in each case. These methods are:
- Direct planting. This is the simplest method, as it’s basically the way a cannabis seed could be expected to grow in nature. Plant your seed about 2.5cm deep in moist soil, and use a heating pad to keep it warm if necessary.
- Germination stations and starter cubes. You can also invest in products like germination stations, which are essentially propagators that have built-in heating pads and specifically designed for germinating seeds. These are typically used along with starter cubes – small pre-packed cubes of soil or substrate that a seed can be inserted into. These are easy to work with, and the cubes are easy to transplant.
- Soak seeds in water overnight. This is often the quickest of the germination methods – just take your seeds and drop them into a glass of tepid water. Leave them overnight, but don’t leave them for more than 24 hours! This will starve them of oxygen, causing them to drown and die. However, in most cases by the time you wake up the next morning and check your seeds, they will have at least begun to extend their taproots.
- Paper towel method. This is a classic technique – just sandwich your seeds between two wet (moist, not soaking) paper towels, set them between two plates, and leave it somewhere warm for a day or two. Check the paper towels every so often to make sure they do not dry out.
How to Transplant Cannabis Seeds
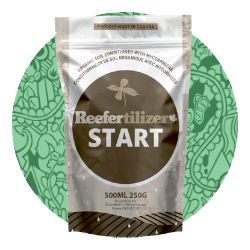
Use loosely packed potting soil, but don’t add any nutrients – your plants aren’t ready for those yet, but you can add a soil conditioner such as Reefertilizer Start to protect the roots and encourage growth.
Poke a shallow quarter-inch hole in the soil, then pick up each seed with a pair of tweezers and gently place it taproot-down in its new growing medium before covering it in a thin layer of soil.
Once you see the taproots emerge from your seeds, it’s time to transplant them for the first time. This process is simple, but must be performed carefully.

The seeds are vulnerable to infection at this stage, so it’s important to keep them sterile.
First, prepare your plants’ new homes. Small 2-inch pots are a good choice at this stage, because the plants’ need for oxygen will outweigh their water demands until they are a bit bigger. Solo cups also work well.
Taking Care of Your Seedlings
For the first two weeks, you’ll need to pay special attention to your plants as they are still vulnerable.
- Water. Your plants are still very small and could easily drown if you over-water them. Once again, the goal is moist soil, not wet or soaking. Since the plants primarily need oxygen at this point, it’s a good idea to poke holes in the bottom of your small pots or solo cups so that water can pass by the roots more quickly, giving them more oxygen and allowing your plants to grow as quickly as possible. And, of course, make sure you are feeding your plants water with a healthy pH.
- Light. Depending on the type (or types) of lights you have in your grow room, you may have to adjust them fairly often during the first two weeks. If you plan on using high intensity grow lights on your plants later on, you can move the lights further away at first. However, your electricity bill might be unnecessarily high. Instead, you could start the plants off with compact fluorescent bulbs (CFLs) or less intense fluorescent grow lights.
- CFLs are the cheapest option, and they are easy to find at hardware stores, grocery stores, or online. Whatever you use, make sure to check your plants regularly. They grow quickly at this stage, and can grow too close to the lights and get burned if you don’t pay attention. On the other hand, if you notice that your seedlings are stretching, move your lights closer to make sure they are getting as much as they need.
- Nutrients. When your plants are just getting started, don’t give them any nutrients! Or, to be more accurate, don’t give them any extra nutrients. Each cannabis seed already contains lots of nutrients, and it’s very easy to give the plant too much if you add more. Your plant will be able to feed itself for at least the first week before it needs any additional help.
The First Two Weeks

During the first two weeks, your cannabis plants will grow very quickly.
Once the germinated seed is planted, the taproot will grow longer and longer, gradually pushing the seed up out of the soil. The first round leaves, known as cotyledons, will crack open the shell and spread out to face the light.
The cotyledons are also where the cannabis seed keeps its initial store of nutrients that it will consume during the first week (or weeks).
Cotyledons are formed while the plant is still inside its seed, and do not have cannabis’ signature serrated edges and fingers. Soon after the cotyledons emerge and spread, the seedling will begin growing its first “true” leaves. After about two weeks of growth, the plant will be big and strong enough that you can move it to a new pot.
A good rule of thumb is that the new container should be able to hold 2 gallons for every 12” of your plant’s final height. If you know what strain you are growing, you can plan ahead. However, if you aren’t sure how big it’s going to grow, it’s better to have a container that is too big than one that is too small. If your plants become rootbound at any point, their growth can be stunted permanently.
Once you move your plant to its new container, it should be ready for standard vegetative stage treatment. After the first few weeks, it’s time to start feeding your plants nutrients. Happy growing!
If you want to learn even more about growing good cannabis, we offer a free 40+ page guide full of images.
Now available on Amazon.
Sign up for our newsletter and download the digital copy today!
This guide will answer many questions about growing cannabis, like the following...
Selecting Seeds
Identify and Correct Problems
Maximize Yield
Much More...
Get a Chance to INSTANTLY WIN a Reefertilizer Nutrient Kit When You Sign Up.
Elijah Petty is a writer in the cannabis industry. He aims to use his platform to help educate people about cannabis and dispel some of the myths and misinformation that surround the plant.